Overview
Voice Agents integrates with WhatsApp Business API to provide a unified communication experience. Customers can seamlessly switch between voice calls and WhatsApp messaging, with conversation context maintained across both channels. This creates a more flexible and accessible customer service experience.Unified Communications
Seamlessly transition conversations between voice and WhatsApp messaging while maintaining full context.
Rich Media Support
Send images, documents, location data, and interactive buttons through WhatsApp integration.
24/7 Availability
Provide instant responses via WhatsApp even when voice agents are busy with other customers.
Global Reach
Connect with customers worldwide using their preferred messaging platform.
Prerequisites
Before setting up WhatsApp integration, ensure you have:- WhatsApp Business Account - Verified business account on WhatsApp
- Meta Business Manager - Access to Meta Business Manager with admin permissions
- Phone Number - Verified business phone number (cannot be used on regular WhatsApp)
- Voice Agents Account - Active Voice Agents platform subscription
Required Information
You’ll need to collect these details during setup:- App ID - Your Meta app identifier
- Phone Number ID - WhatsApp Business phone number identifier
- WhatsApp Business Account ID - Business account identifier
- Access Token - Permanent access token with messaging permissions
- Webhook Verify Token - Custom token for webhook verification
Setup Guide
Step 1: Create or Select Meta App
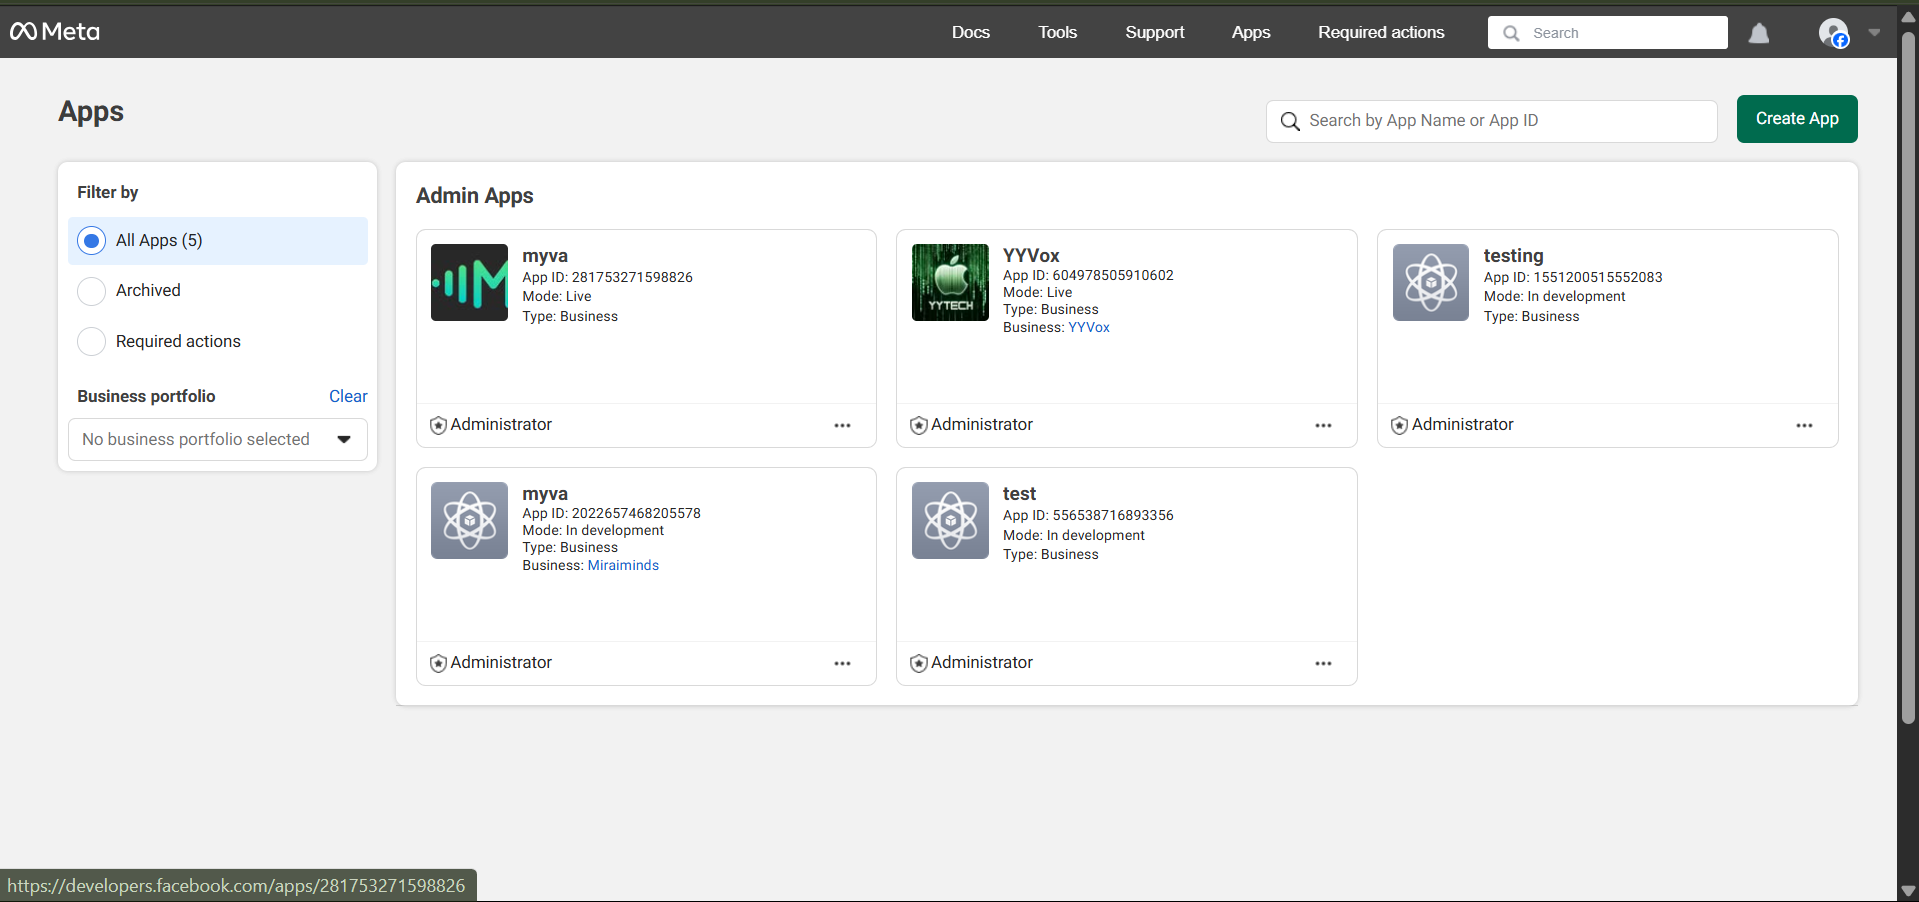
Option A: Create New App- Visit Meta for Developers
- Click “Create App” in the top-right corner
- Select “Business” as your app type
- Provide required details:
- App name (e.g., “Your Company Voice Agent”)
- Contact email address
- Business Manager account (if applicable)
- Click “Create App” to proceed
- Access your Meta for Developers dashboard
- Select your existing app from the “My Apps” section
- Ensure the app has appropriate permissions for WhatsApp Business
Step 2: Configure WhatsApp Business API
-
Add WhatsApp Product
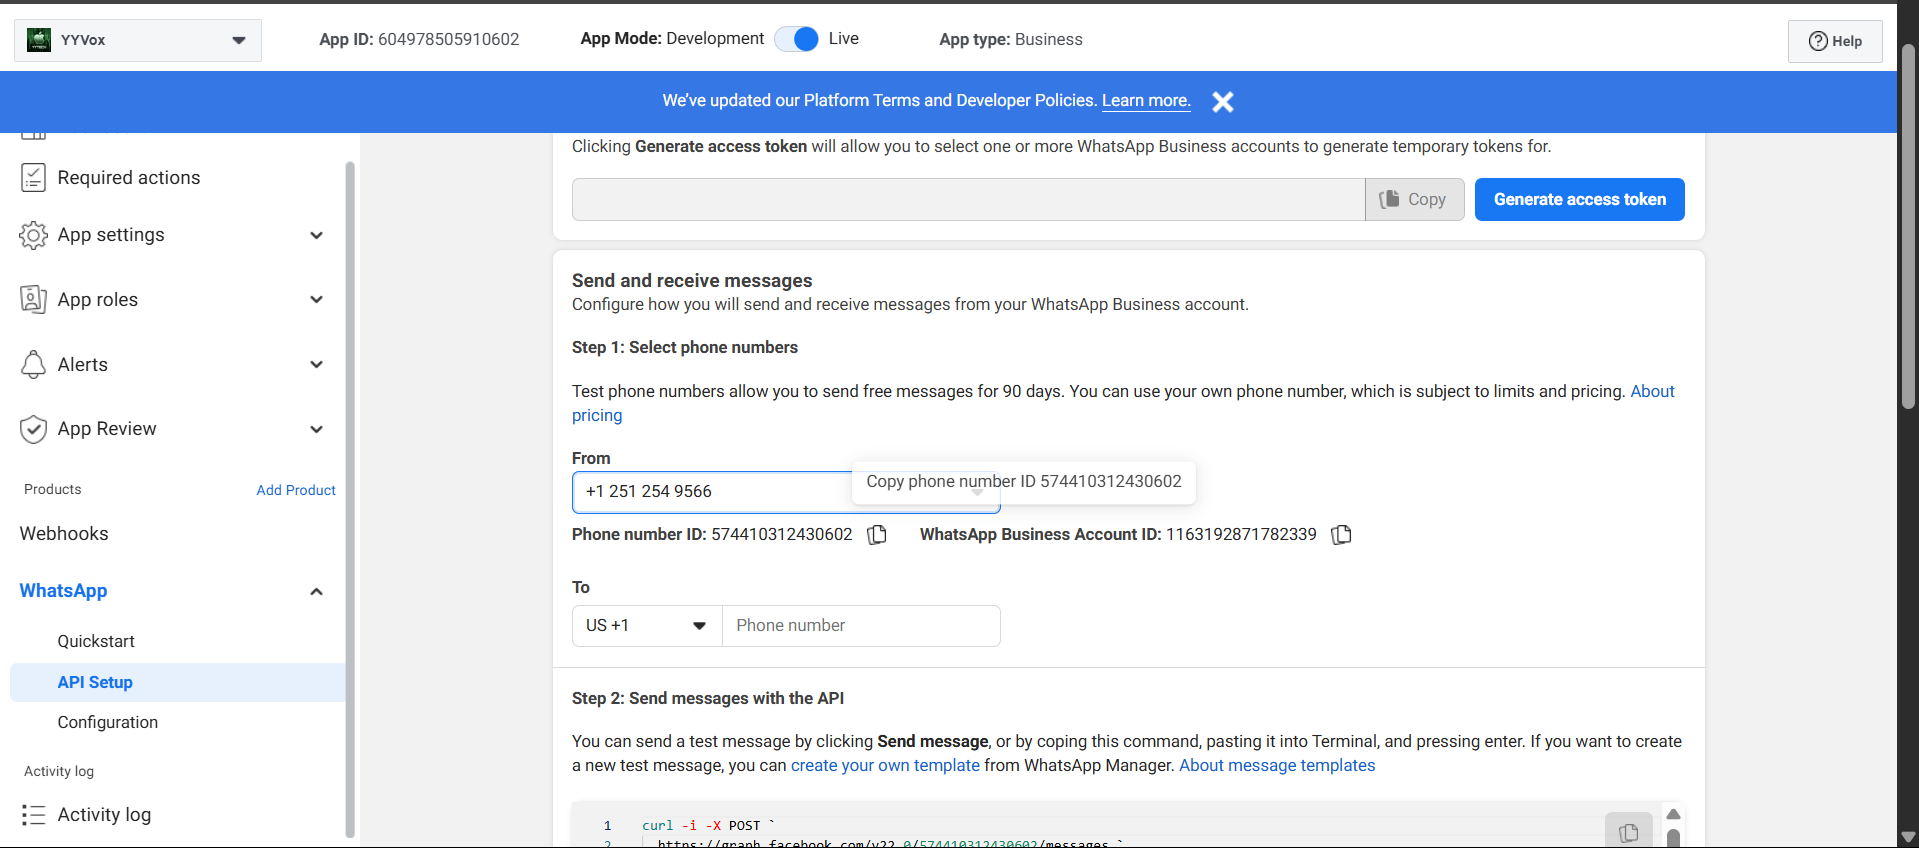
- In your app dashboard, navigate to “WhatsApp” → “API Setup”
- If WhatsApp isn’t added, click “Add to App” next to WhatsApp
-
Configure Phone Number
- Under “Send and receive messages”, go to “Step 1: Select phone numbers”
- In the “From” dropdown, you’ll see:
- Test numbers (for development only)
- Your verified WhatsApp Business numbers
- To add a new number, click ”➕ Add Phone Number”

Step 3: Collect Required IDs
Once your phone number is configured:- Select your verified WhatsApp Business number from the dropdown
- Record these important values:
- Phone Number ID - Found below the selected number
- WhatsApp Business Account ID - Located to the right of the Phone Number ID
- App ID - Displayed in the top-left corner of the dashboard
Step 4: Generate Permanent Access Token
-
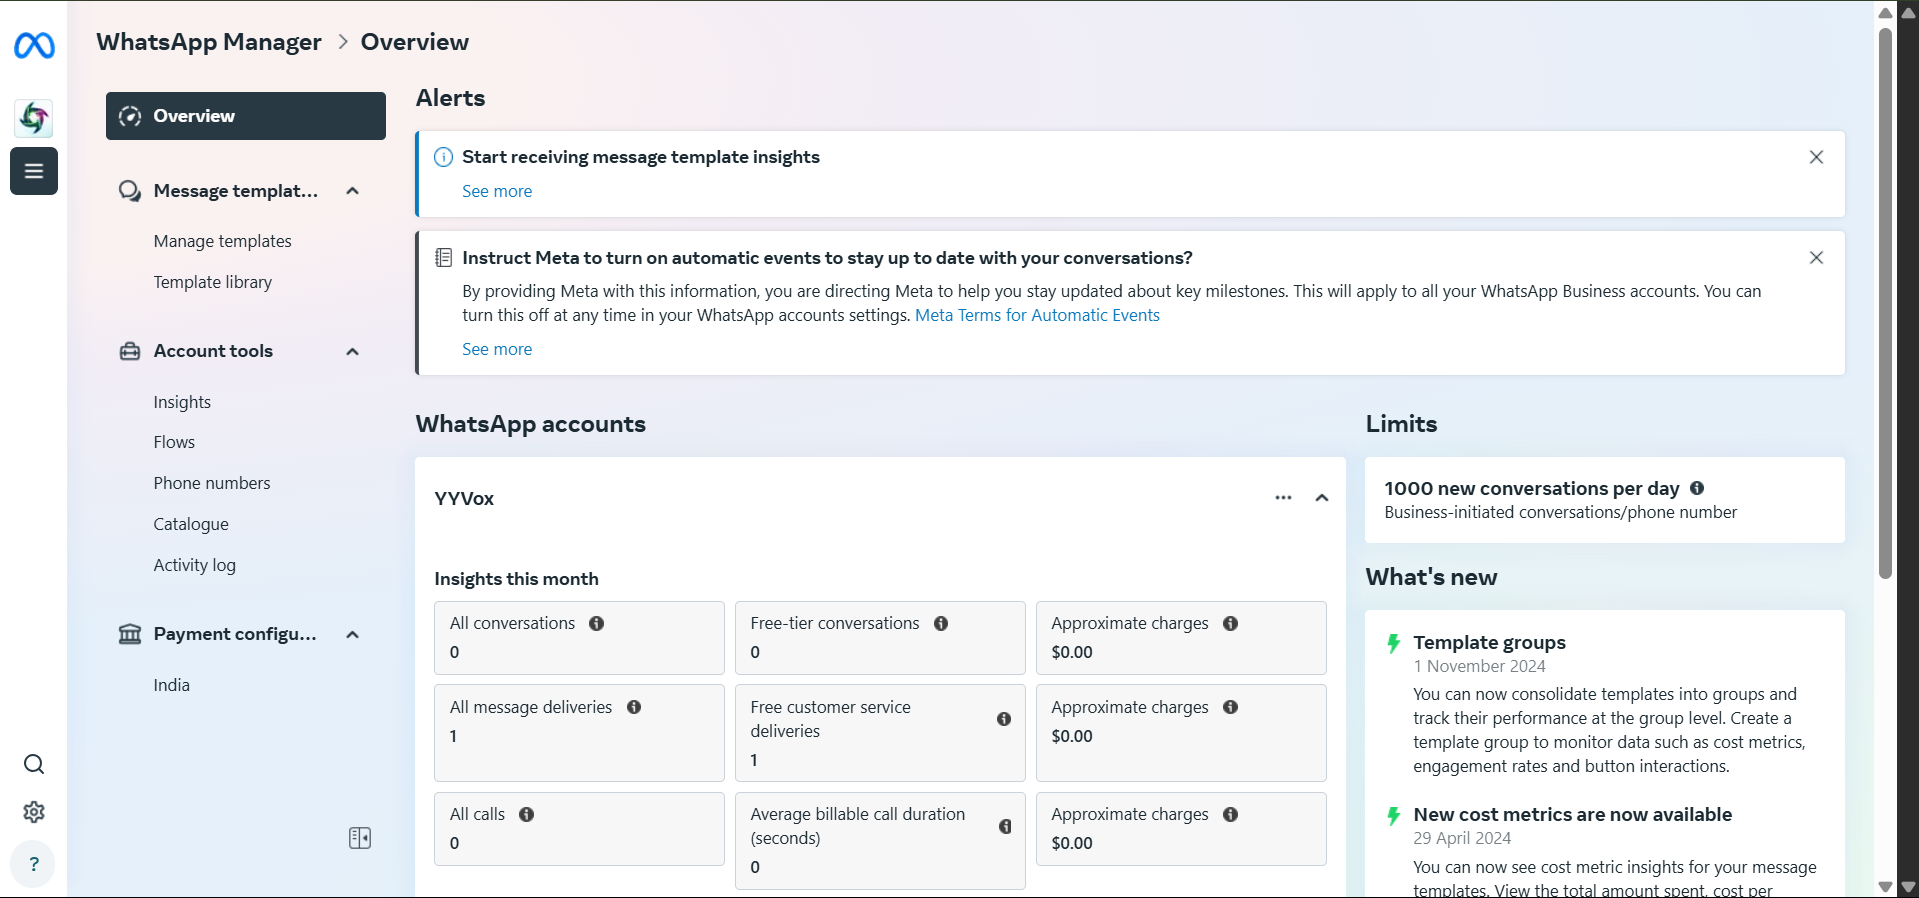
Open WhatsApp Business Manager
Navigate to Meta Business Manager and access WhatsApp Manager.
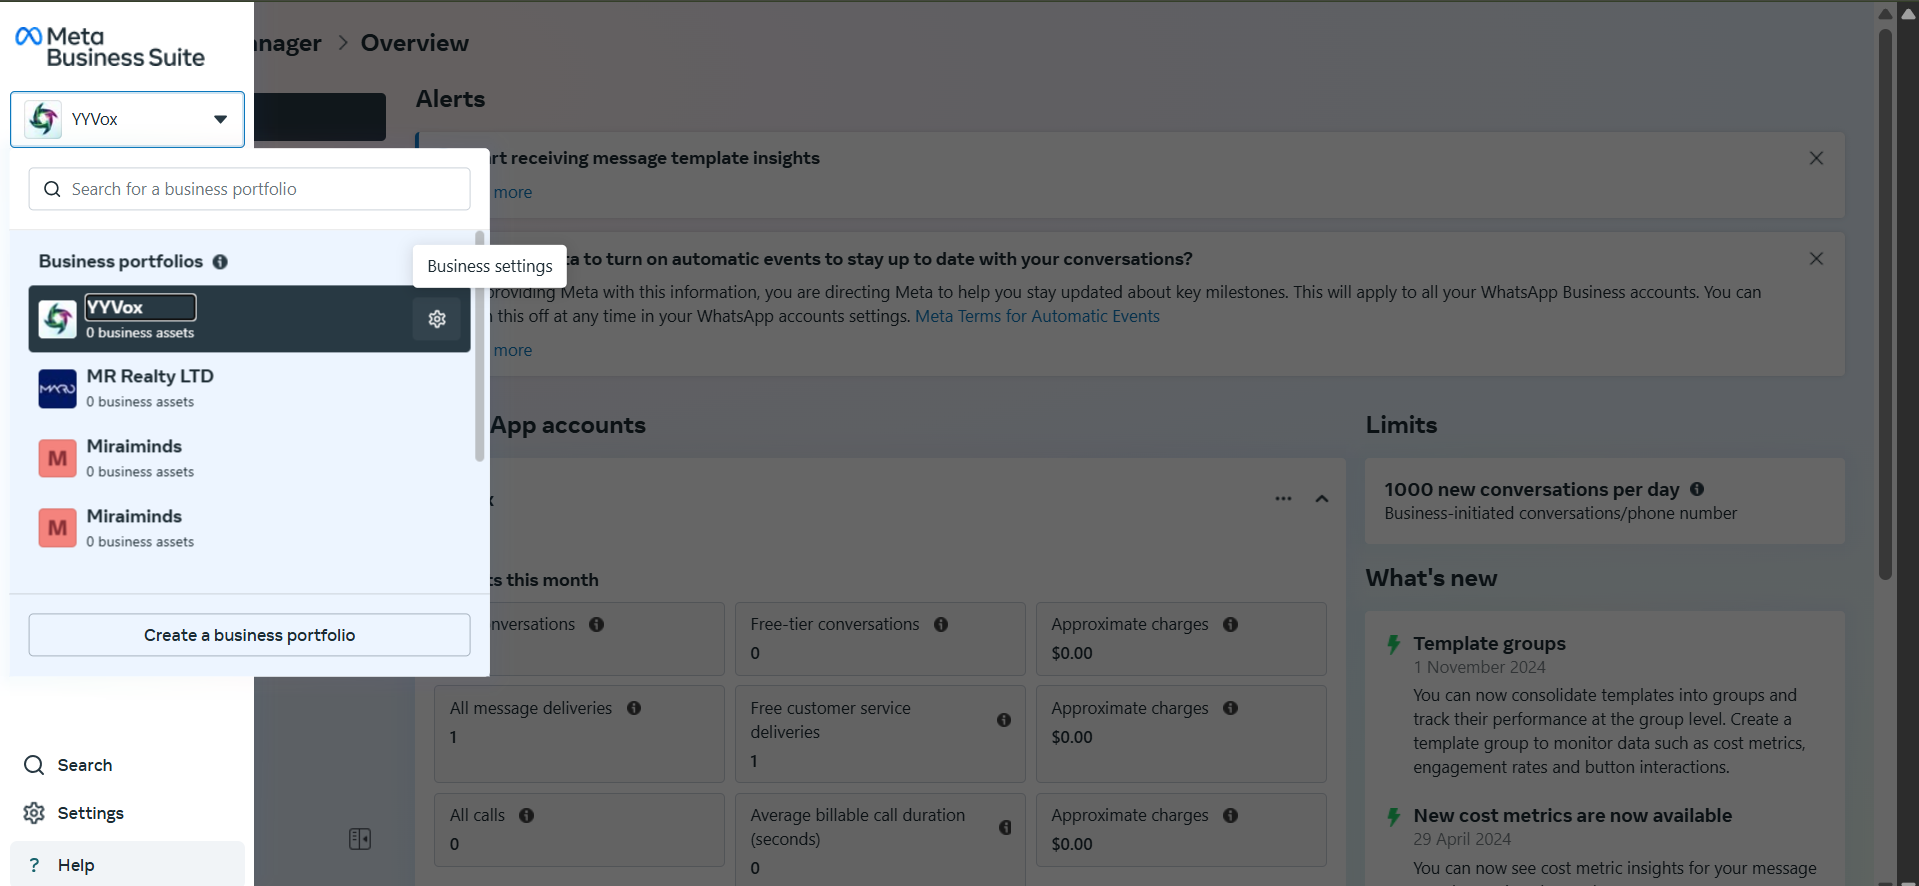
- Select Business Portfolio Choose your business portfolio from the top-left dropdown menu.
-
Access Business Settings
Click “Business Settings” to manage your business configuration.
- Navigate to System Users In the left sidebar, select “System Users” under the Users section.
-
Select Admin User
Choose a system user with Admin or Full Access permissions.
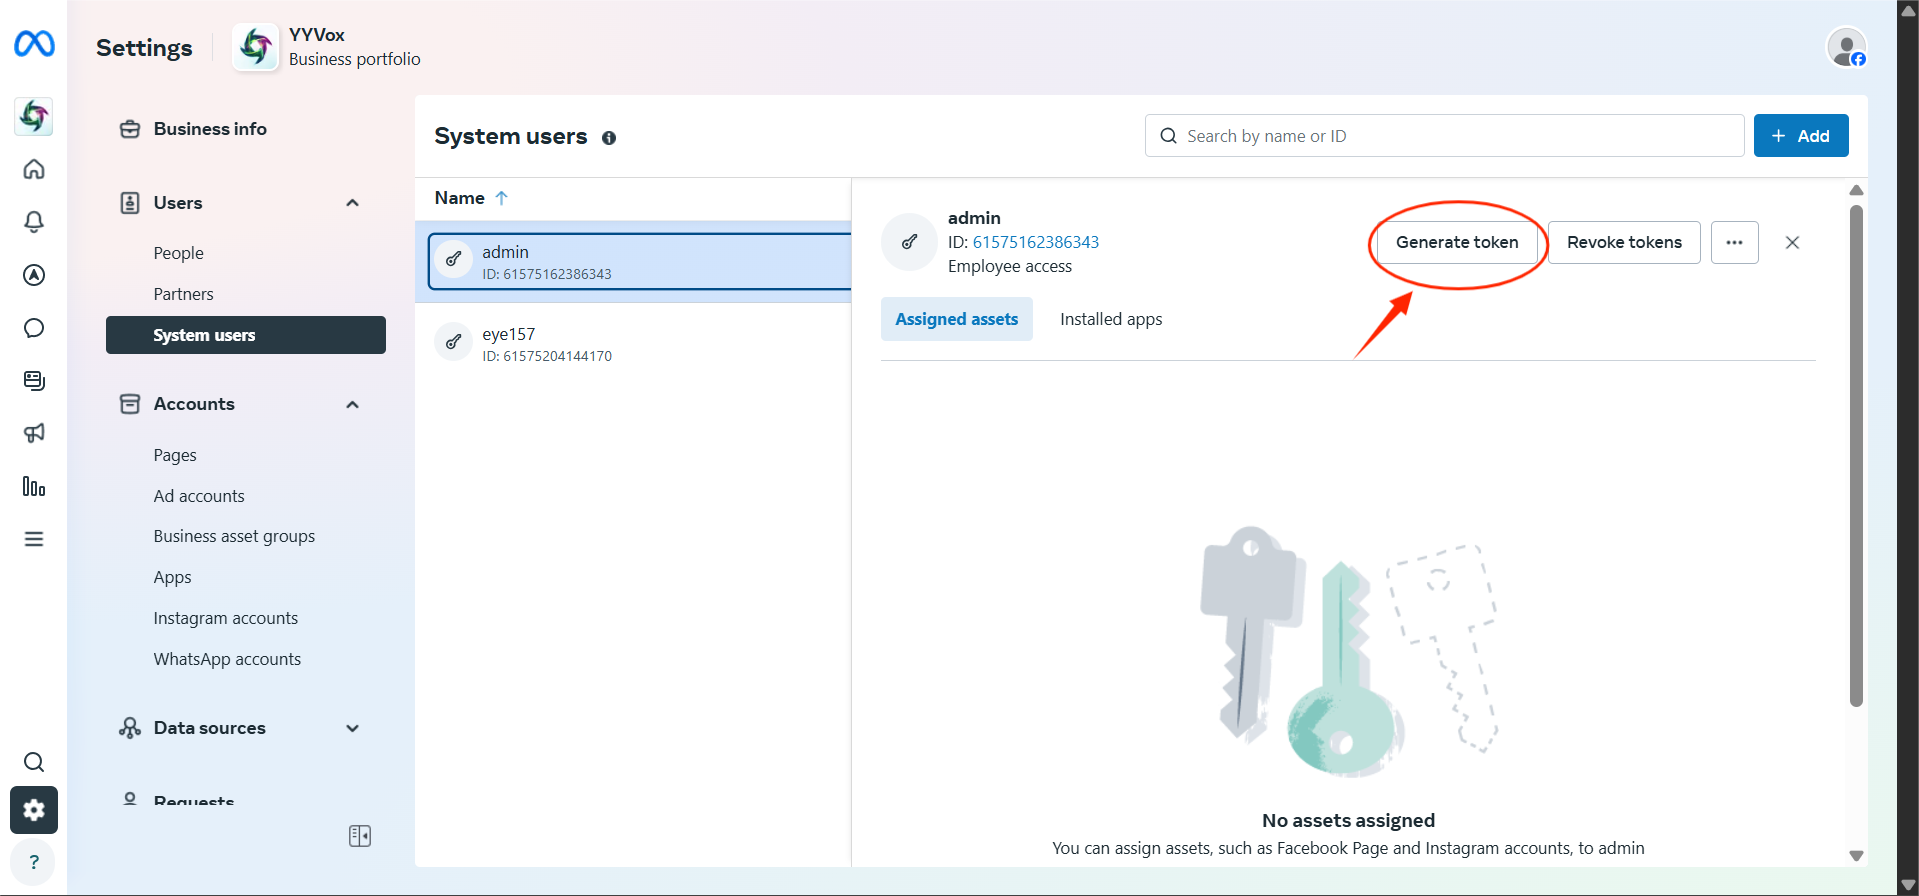
-
Generate Access Token
Click “Generate New Token” and configure:
- App Selection: Choose the app you configured in previous steps
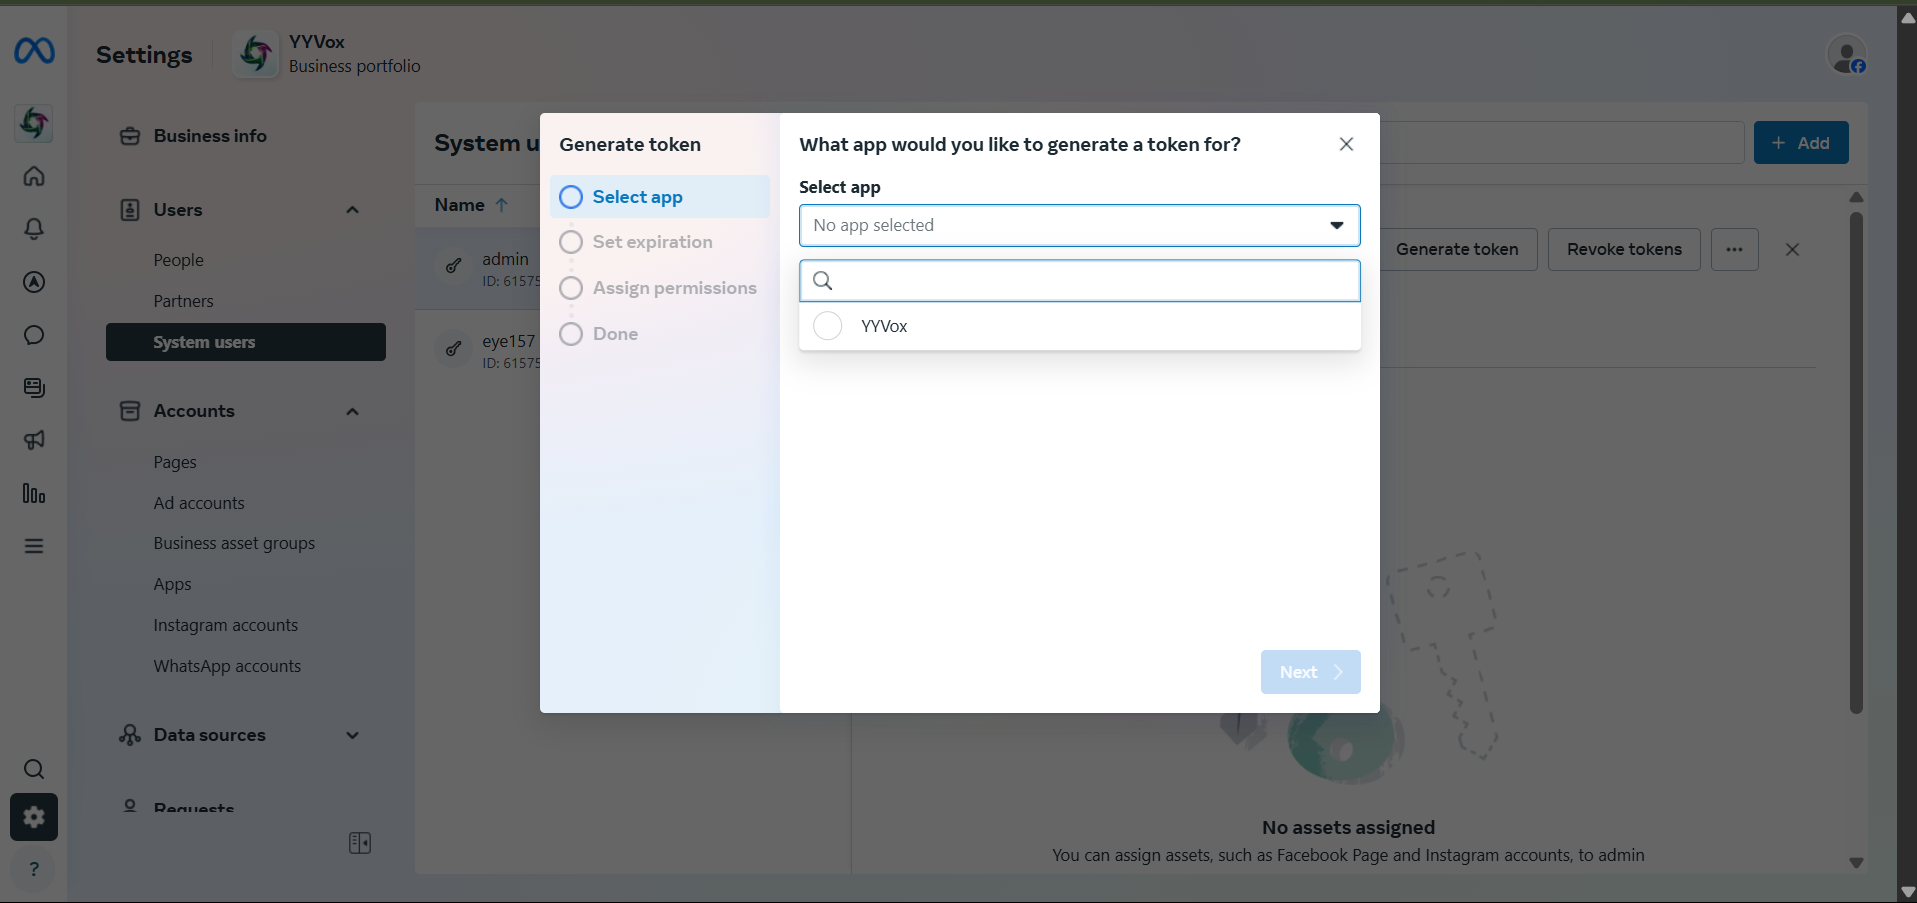
- Token Expiration: Select “Never” for a permanent token

- Required Permissions:
whatsapp_business_messaging- Send and receive messageswhatsapp_business_management- Manage business settings
- Secure Your Token Copy and securely store the generated access token. This token provides full access to your WhatsApp Business messaging capabilities.
Step 5: Create Message Templates
WhatsApp requires pre-approved templates for business-initiated conversations:- Access Template Manager Go to WhatsApp Manager → Message Templates.
-
Create New Template
Click “Create Template” and provide:
- Template Name: Descriptive name (e.g.,
order_confirmation) - Category:
- Marketing - Promotional content
- Utility - Account updates, order status
- Authentication - Verification codes, security alerts
- Language: Your target language (e.g.,
en_US) - Message Content: Include dynamic variables using
{{1}},{{2}}syntax
- Template Name: Descriptive name (e.g.,
- Submit for Review Templates typically get reviewed within 24 hours. Only approved templates can be used for business-initiated messages.
-
Template Best Practices
- Keep messages concise and relevant
- Use clear variable placeholders
- Follow WhatsApp’s messaging policies
- Create templates for common use cases (order updates, appointment reminders, support responses)

Step 6: Connect to Voice Agents
- Access Voice Agents Dashboard Log in to your Voice Agents platform and navigate to Integrations.
-
Configure WhatsApp Integration
Click “Connect” next to WhatsApp and provide:
- App ID (from Step 3)
- Phone Number ID (from Step 3)
- WhatsApp Business Account ID (from Step 3)
- Access Token (from Step 4)
- Webhook Verify Token (create a custom secure string)
- Test Connection Send a test message to verify the integration is working correctly.
Use Cases & Capabilities
Once integrated, your Voice Agents can:Customer Support
- Seamless handoffs between voice and WhatsApp
- Rich media sharing like product images, receipts, and documents
- Quick replies with predefined response options
- Interactive buttons for common actions
Business Communications
- Order confirmations with tracking links
- Appointment reminders with rescheduling options
- Support ticket updates with status changes
- Marketing messages (with proper opt-in consent)
Advanced Features
- Location sharing for store locations or delivery tracking
- Multi-language support with localized templates
- Analytics integration for message performance tracking
- CRM synchronization for unified customer profiles
Best Practices
Compliance & Privacy
- Always obtain proper consent before messaging customers
- Respect opt-out requests immediately
- Follow WhatsApp Business Policy guidelines
- Implement proper data retention policies
Message Optimization
- Use approved templates for business-initiated messages
- Keep response times under 24 hours during business conversations
- Provide clear next steps in every interaction
- Use rich media strategically to enhance communication
Integration Management
- Monitor webhook delivery and response times
- Implement proper error handling and retry logic
- Set up alerts for API rate limit warnings
- Regularly review and update message templates