This documents the v1 product. It is kept for integrations already running
on it. If you are building something new, start with the
Quickstart.
Overview
The Klaviyo integration adds phone calls to your marketing campaigns. When you add a Voice Agent webhook node to a Klaviyo flow, you can reach customers in that flow with personalized voice calls, which improves engagement and conversion rates. On the call, the voice agent can deliver campaign messages, collect feedback and help customers directly.Recover Abandoned Cart
Raise recovery rates by up to 30% with automated voice calls, which outperform traditional email or WhatsApp campaigns.
Replenishment Reminders
Remind customers by phone when it’s time to reorder a replenishable product, so they don’t run out of essentials.
Actionable Feedback Collection
Call customers to collect actionable feedback that you can use to improve your products and services.
Personalized Outreach
Use customer data from Klaviyo to personalize each call, which makes calls more relevant and raises response rates.
Setup Guide
Step 1: Add Webhook Node in Klaviyo Flow
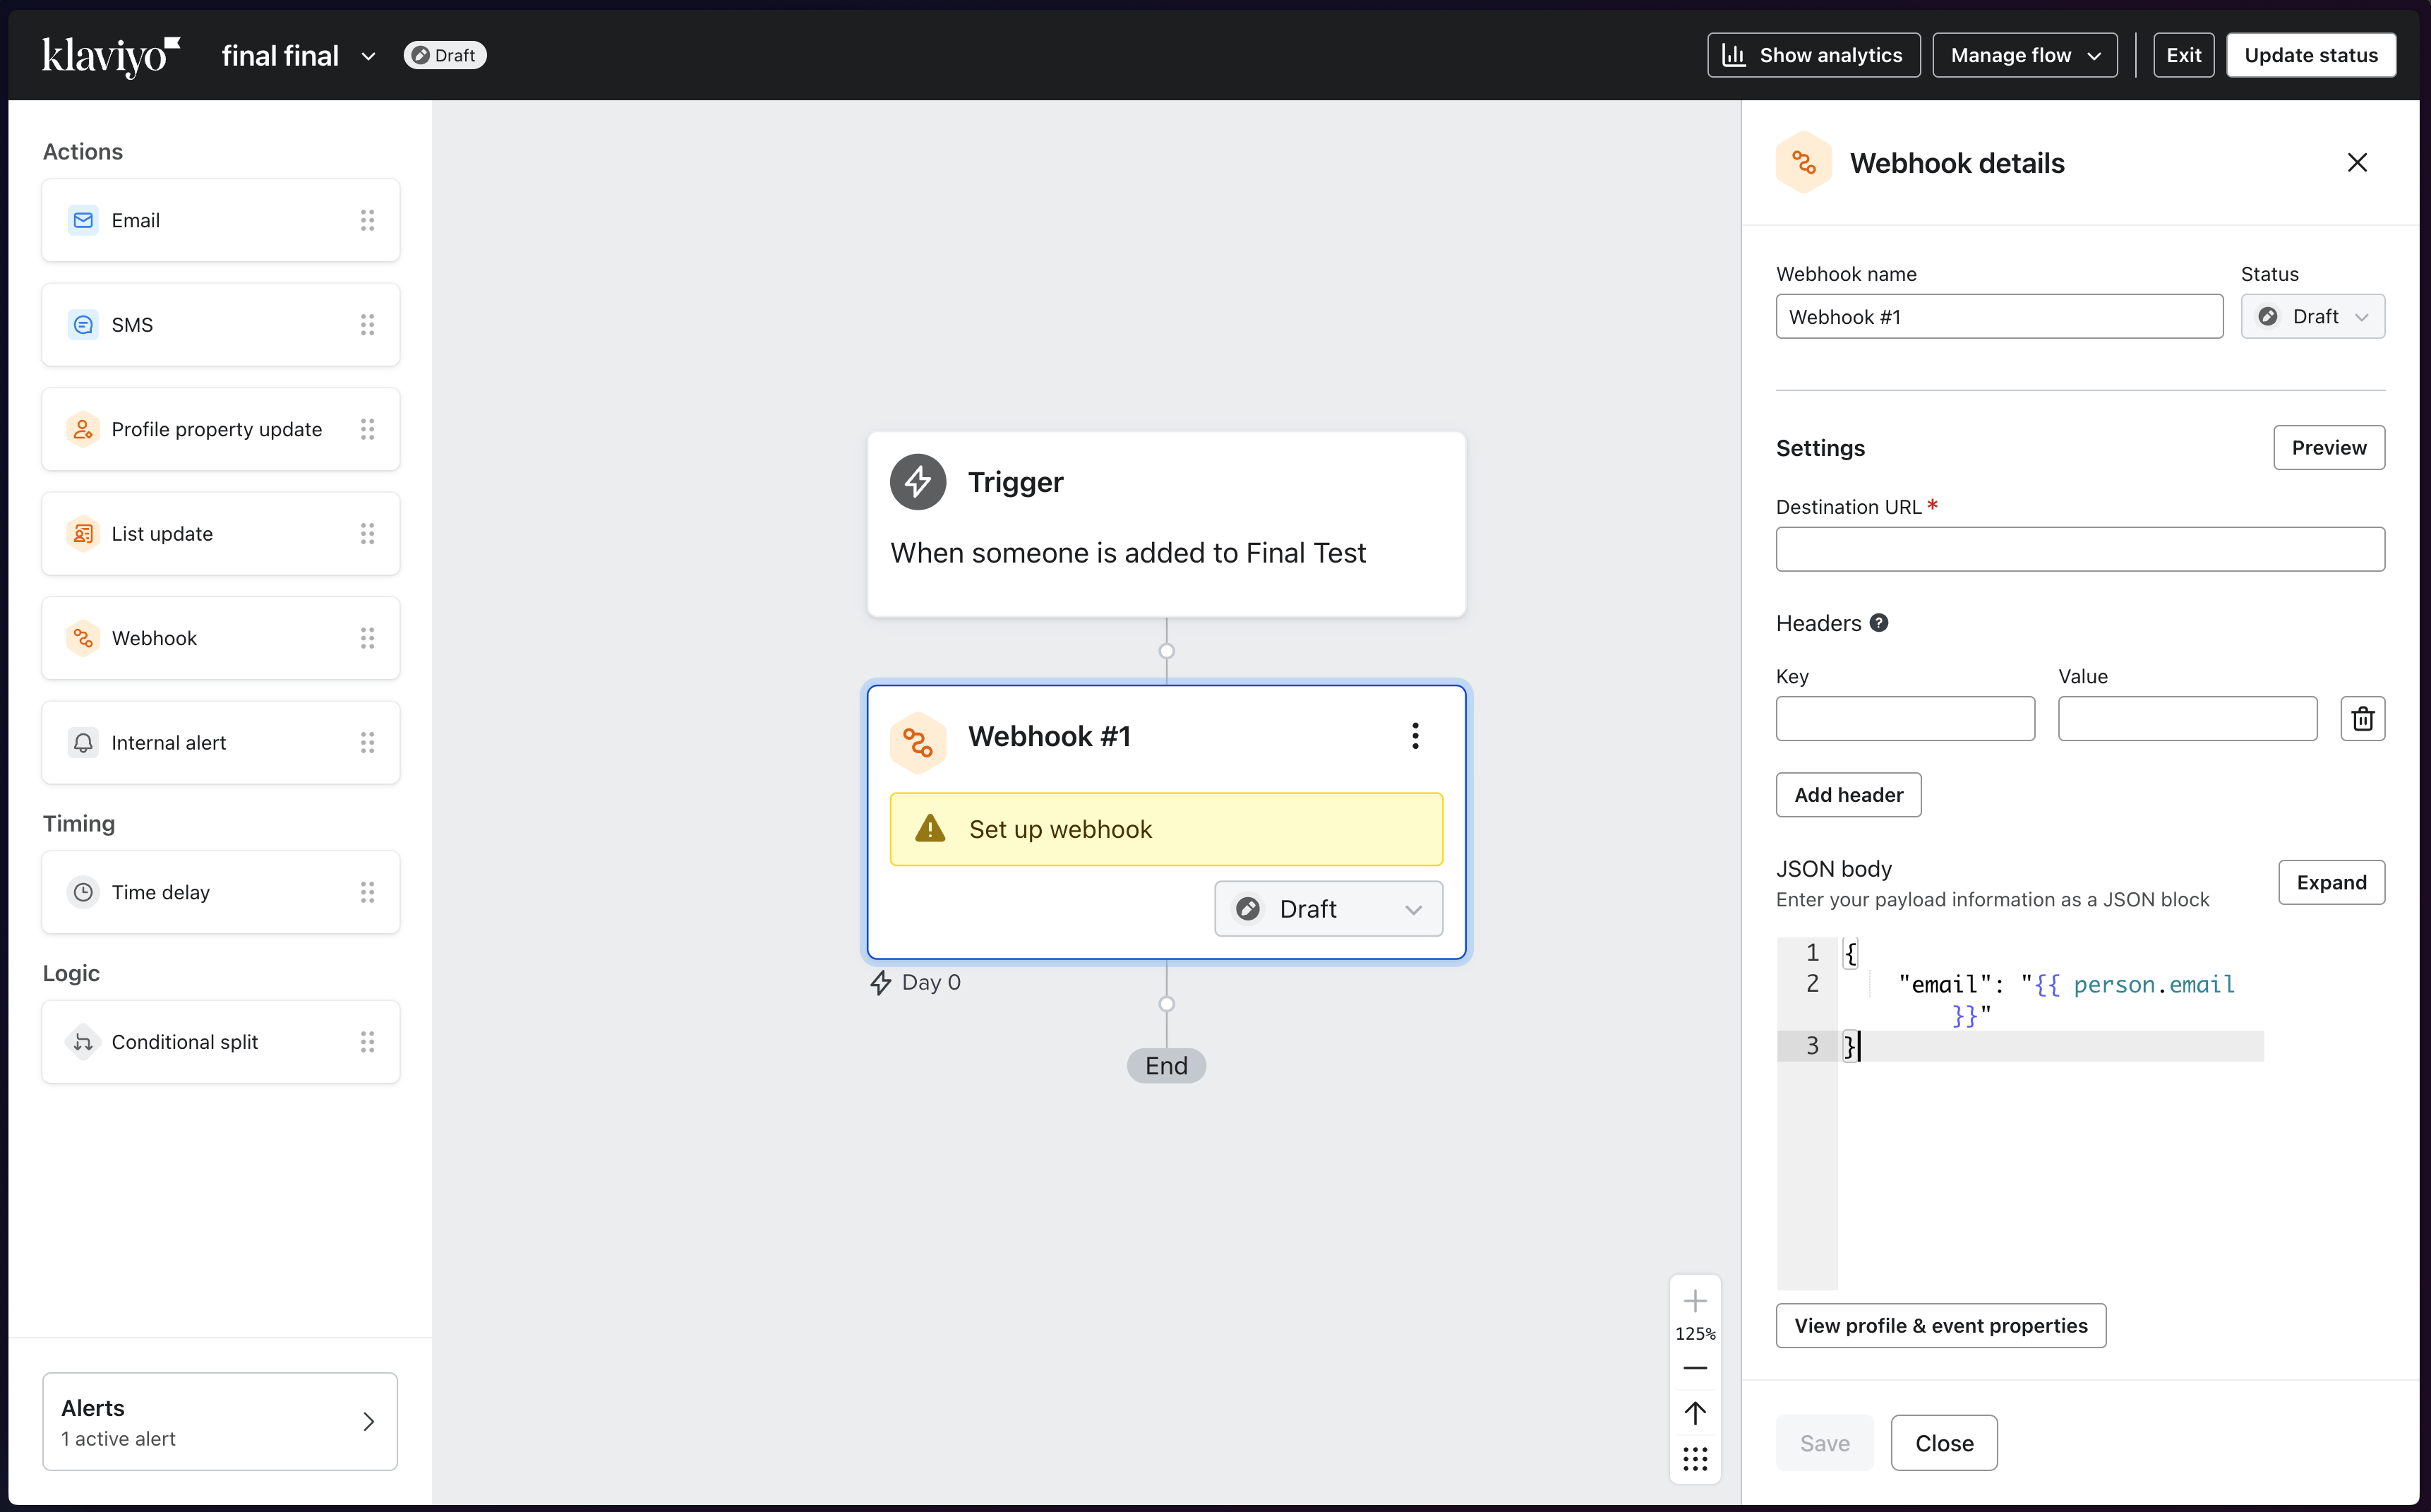
- Navigate to Your Klaviyo Flow Open the Klaviyo flow where you want to add voice calls, or create a new one.
-
Add Webhook Node
Click the ”+” button to add a new action and select Webhook from the available options.
Step 2: Create Voice Agent Campaign with Webhook Support
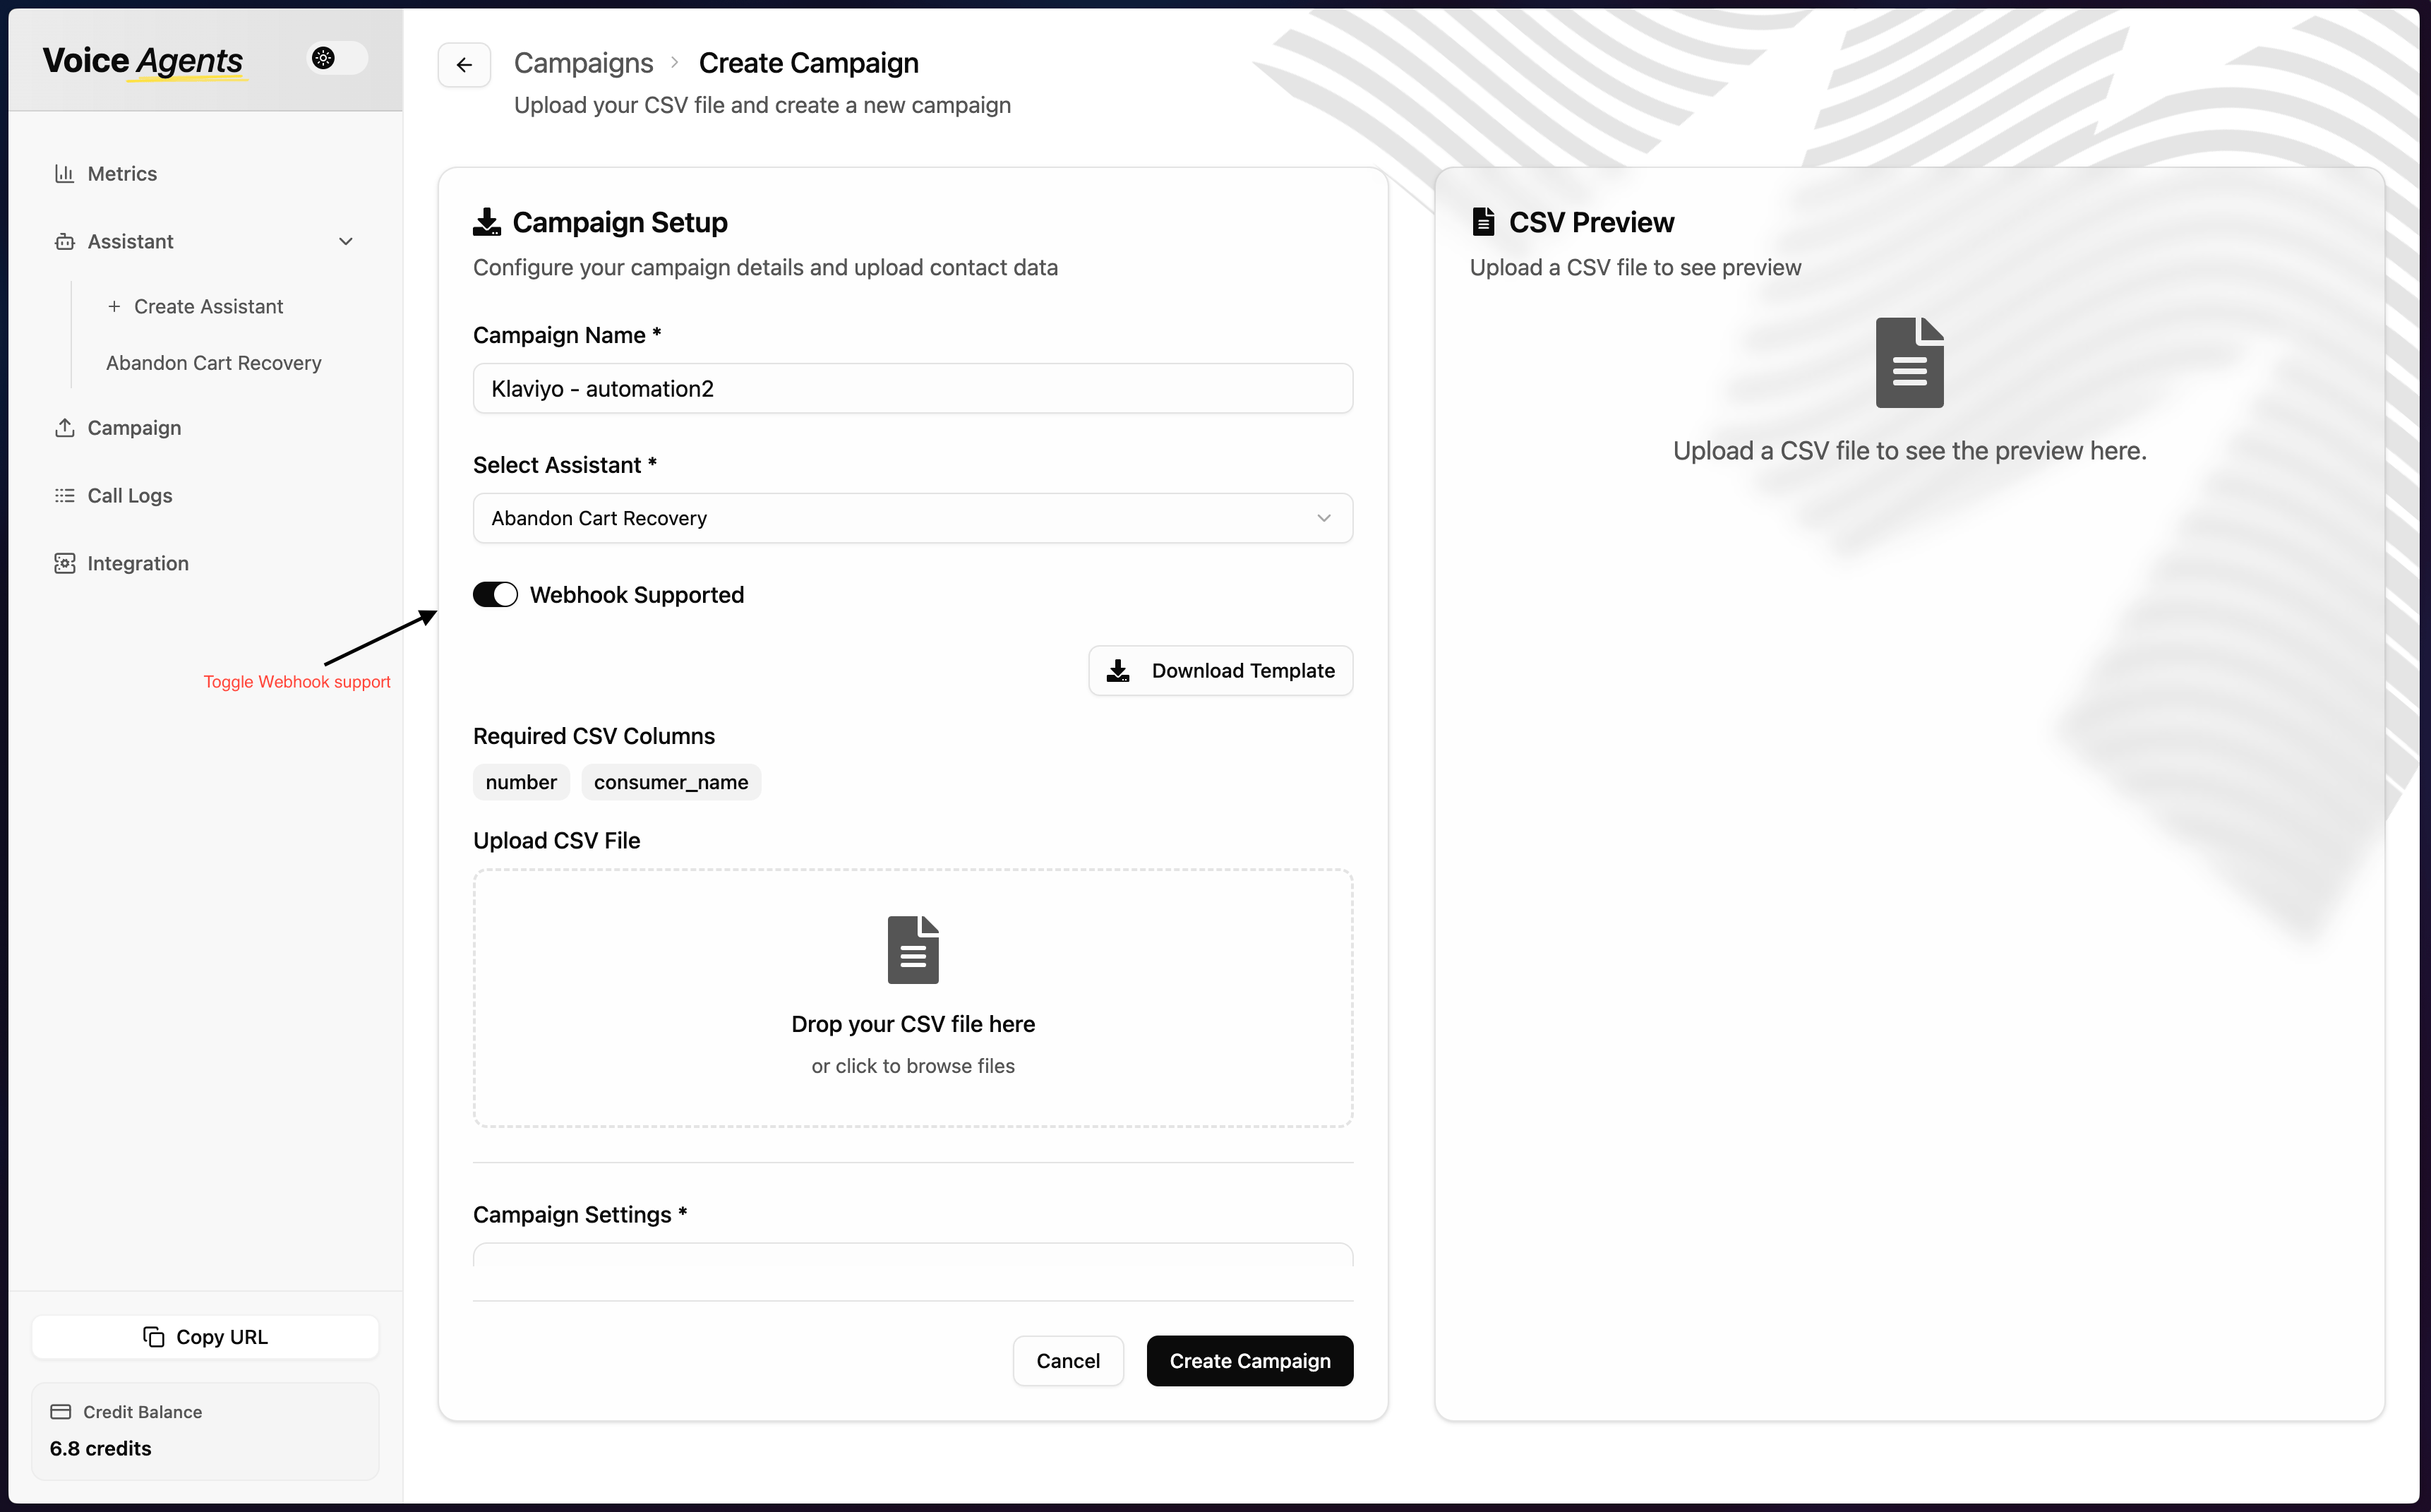
- Access Voice Agents Dashboard Navigate to the Campaigns section in your Voice Agents platform and create a new campaign.
-
Enable Webhook Integration
When you create the campaign, enable webhook support. This lets Klaviyo send contact data directly to your voice agent campaign.
Step 3: Copy Webhook Details
-
Copy Webhook Endpoint
After you create the campaign with webhook support enabled, click the “Copy Webhook” button to open the webhook configuration modal.
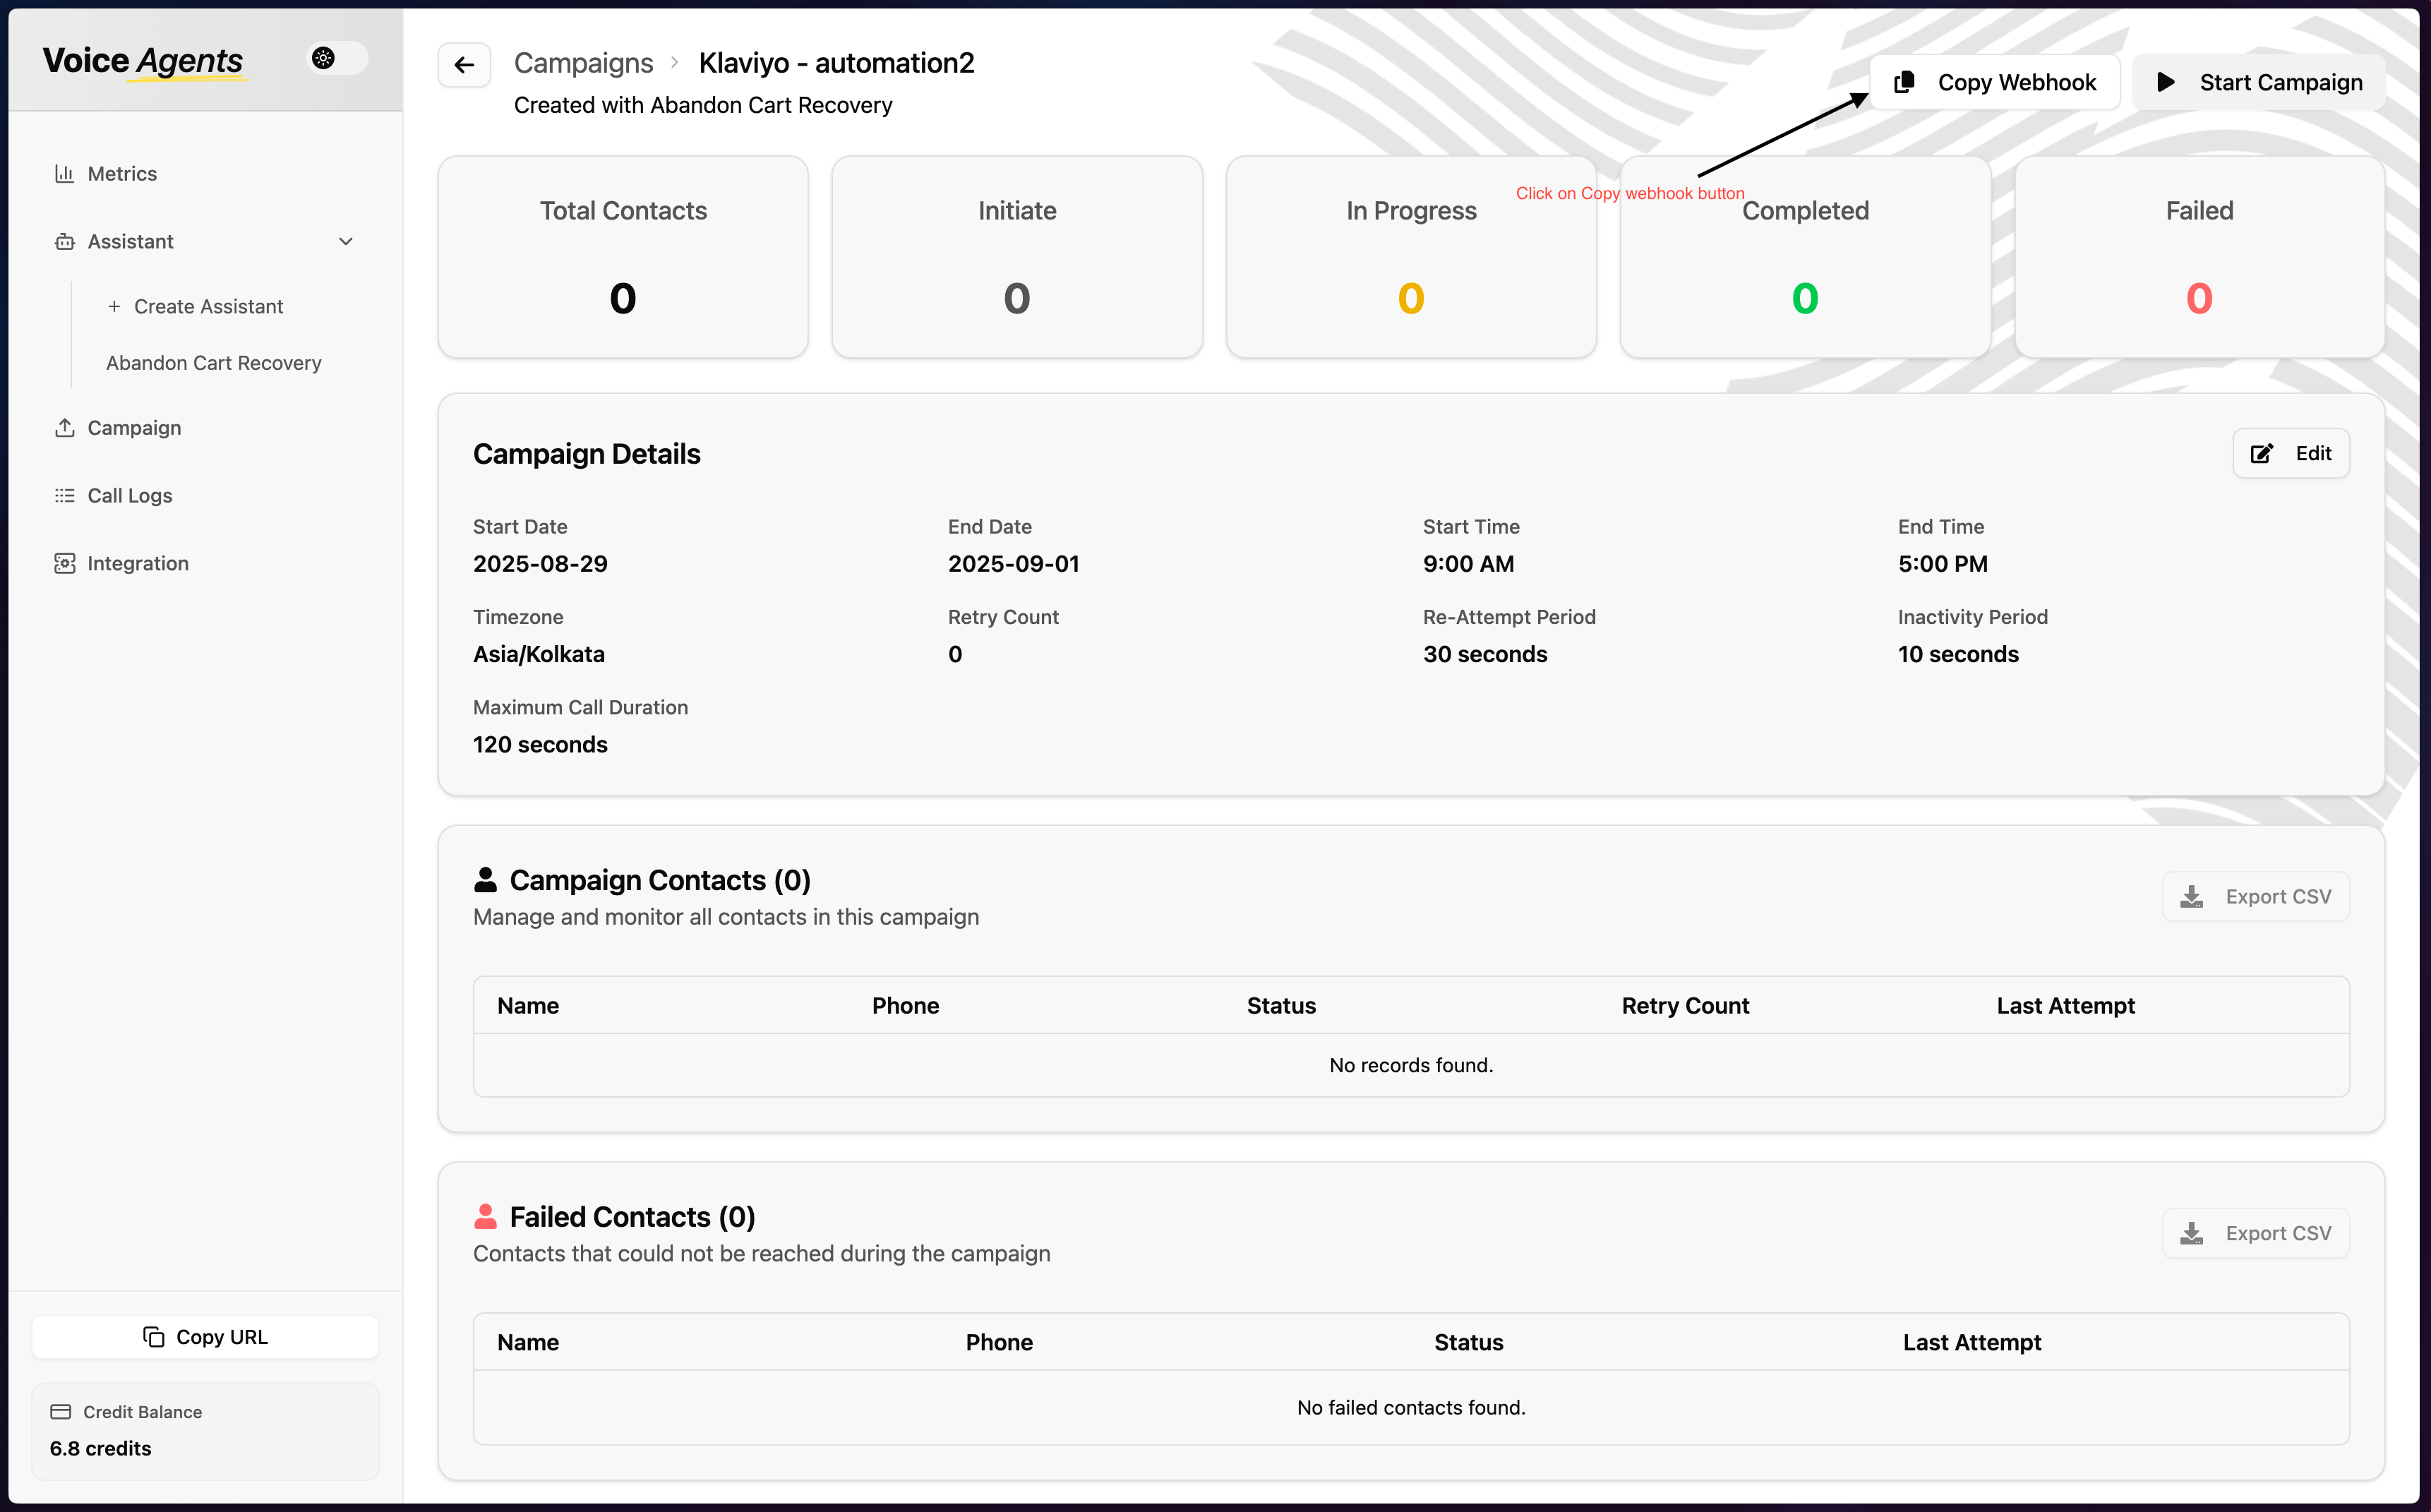
- Webhook URL: the endpoint where Klaviyo sends data
- Secret Key: used to authenticate requests between the two platforms
Step 4: Configure Klaviyo Webhook
-
Setup Webhook in Klaviyo
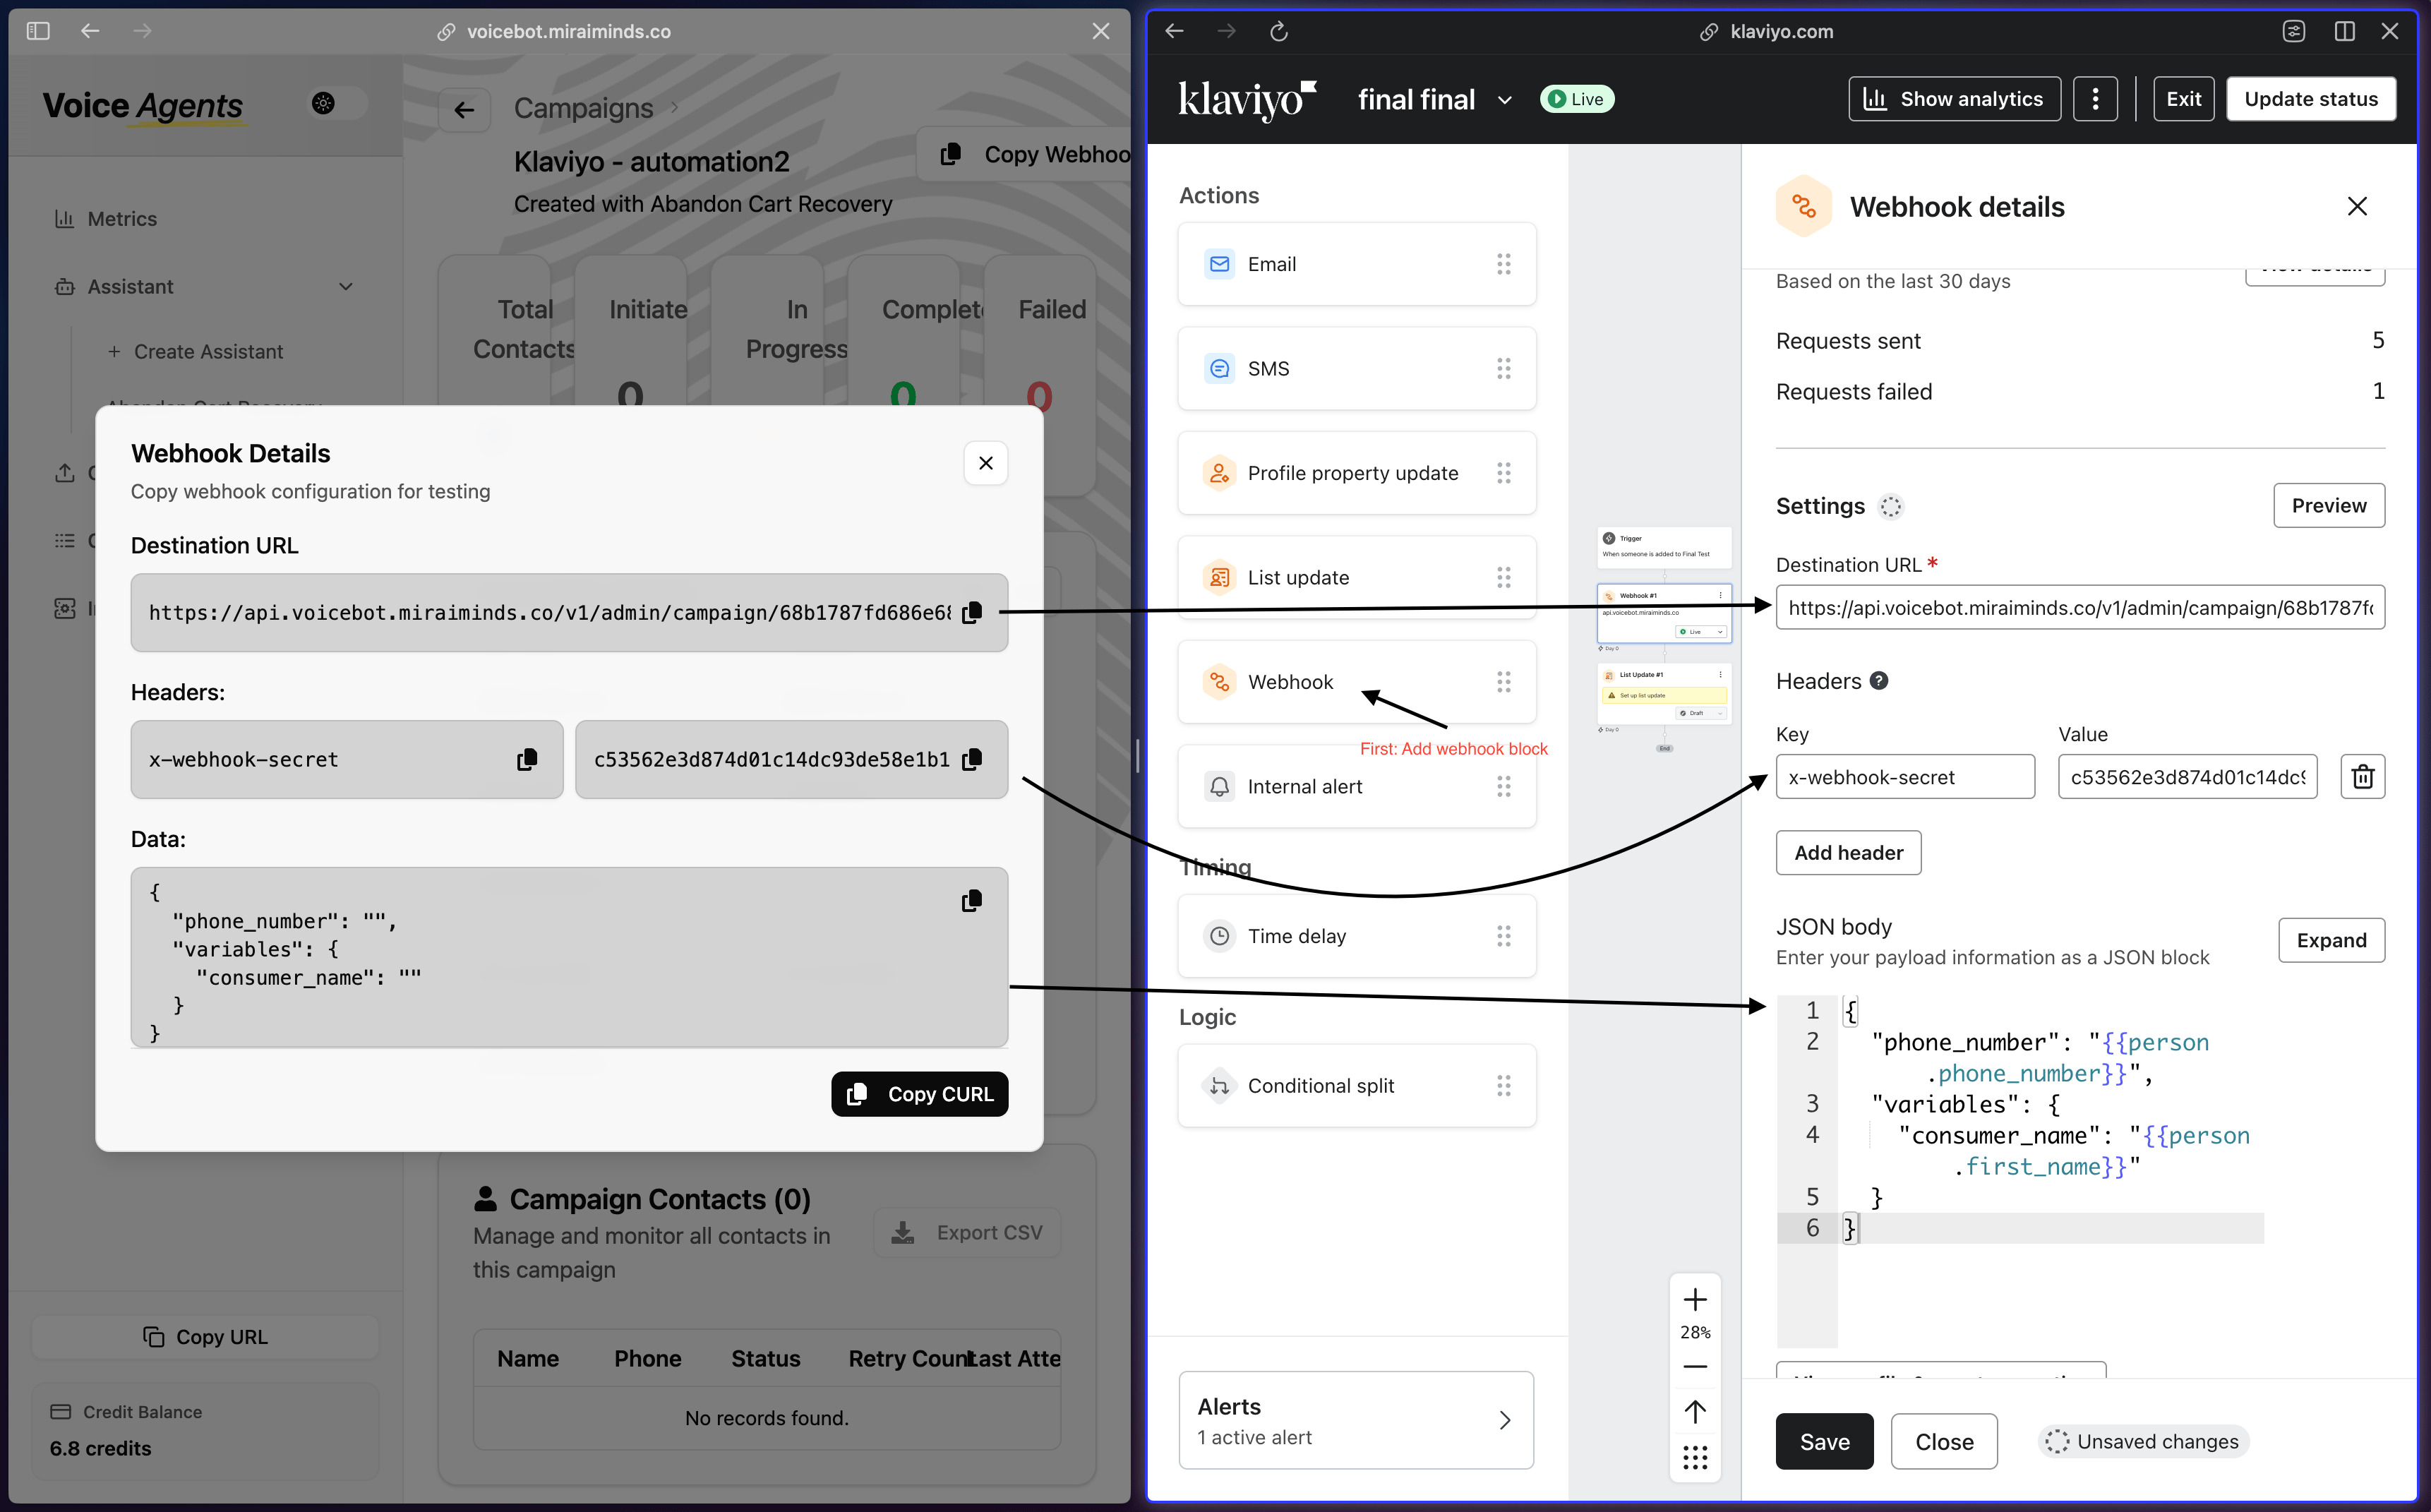
Return to your Klaviyo flow and configure the webhook node with the details from your Voice Agent campaign:
- Paste the Webhook URL in the endpoint field
- Add the Secret Key for authentication
- Configure any additional payload data you want to send
- Test and Activate Test the webhook to check that data reaches Voice Agents from Klaviyo correctly, then activate your flow.
What’s Next?
Once your integration is complete, your Klaviyo flows can automatically trigger voice agent calls for:- Abandoned cart recovery, to reach customers who left items in their cart
- Post-purchase follow-up, to collect feedback and encourage repeat purchases
- Replenishment reminders, to tell customers when it’s time to reorder
- Win-back campaigns, to bring inactive customers back with personalized calls